18 October 2013

Maple Glazed Turnips in a Mizuna Nest


Scrub the turnips, there is no need to peel them, but they look a bit fancier if you do. Cut into 1 inch chunks.


Heat the oil in a large skillet and add the turnips (as you can see I did this in reverse, either way works). Cook for about 2 minutes or until the edges begin to brown. Stir a couple of times to make sure all sides get seared.


Add the juice, maple syrup and vinegar. Cover and bring to a boil (it will be almost instant). Reduce heat and simmer until the turnips are just tender.

While the turnips simmer and make the kitchen smell irresistible, make your mizuna nests. It looks nice, but cutting up the mizuna is probably better if you are planning to eat with others!

When the turnips are just tender, uncover and turn up the heat until the turnips are fully tender and the liquid is reduced to a syrup.

Remove from heat, stir in butter if using, and serve.


Karl added soy sauce and sesame seeds to his, but then tucked in before I could get a picture.

Ingredients
Turnips
1 cup apple juice, water, or broth
½ cup maple syrup (the real stuff)
2 Tbsp apple cider vinegar
2 Tbsp butter (optional)
1 Tbsp coconut oil
salt and pepper to taste (added at serving)


15 October 2013

How do you like your Jalapeños?


Do you like your Jalapeños pickled so you can savour them, or do you make a batch of poppers and devour them all in one go? We eat a lot of pickled Jalapeños, but I will confess they are mostly store bought. Sometimes if I am too lazy to make poppers I will slice up some Jalapeños and put them in the pickle jar - they don't keep too well this way, but I find that is not a problem - they are usually gone in a day or two.

I don't deep fry the poppers, so they probably ought to be called something else. I halve them, stuff in some cheddar, a few breadcrumbs on top and into the oven until everyone starts asking if they are ready.

Last week Jack came home to tell me that cream cheese with Jalapeños was really good on bagels (a reward from his generous Human Geography teacher to the whole class for not scaring the substitute teacher too badly). I didn't even know he liked cream cheese! I don't buy it, but I do make a nice vegan quark with soy kefir - so I might try that in the next round of poppers.

Any good recipes you want to share?

02 October 2013

Happy 1st National Kale Day!


It's wordless Wednesday, but the people over at National Kale Day have so many ideas and recipes and a mission to celebrate "kale’s incredible health benefits, highlights kale’s culinary versatility, and promotes eating, growing and sharing kale throughout America." If you need help celebrating this wonderful vegetable, why not hop on over to check them out: http://nationalkaleday.org/


25 September 2013

Eggs


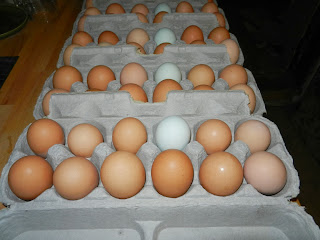
 One of my favourite tasks on the farm is candling and sorting the eggs. When I hold the bright light up against the eggs they glow like old fashioned Christmas lights. With the green eggs I can see the yellow of the yolk through the shell, on others it shows as a faint shadow and on some I can barely see it at all. Sometimes I can make out the tiny air sac at one end - if I want to boil eggs I keep them for a couple of weeks and then candle them again to see if the air sac is big enough to let the shell come off cleanly. You can do this yourself with a bright flashlight - the small LED ones are great as long as the batteries have a good charge. All you need to do is turn out the lights - the darker the room the better for this - and hold the flashlight against the egg so that no light escapes around the egg (this is why the small flashlights are best).


I had intended to include pictures of the candled eggs but I haven't quite worked out how to take a good photograph of them.


13 September 2013

Inside Okra World


I think okra has the most beautiful flowers of any vegetable.


and it seems I am not alone in that thought.

As we picked the okra pods this morning it was impossible to ignore the buzzing! 


Honey bees do not stay still for very long!

This is not a honey bee!


And nor is this!

Or this! But it does look like he is spreading pollen around quite nicely.


21 August 2013

Missing Peaches!


Every year we try to add a few trees to our small orchard in the hope that one day we will be able to eat homegrown fruit along with our homegrown vegetables. Last year we harvested our first peaches - 1 each - and we just knew this year was going to be wonderful! The cool wet spring had us worrying about late frosts that might kill the tender blossoms, but no, they held on. We watched the pollinators do their work - small native bees for the most part. We saw tiny fruitlets form behind the blossoms and then, real fruit! Very small at first, but lots of them and they grew quite large. I annoyed everyone by singing "gonna eat a lot of peaches" every time I set foot in the orchard. We made daily reports: "might be ripe next week", "looking good, but still not quite ready", "one is turning a little bit orange", "the peaches are all gone" - WHAT??!

Yep, there was not a single peach on the trees and all the pears (that we had been excited about too, but lets face it, they aren't peaches). There was just one tiny tree, a mistake, with a few peaches on it. It began life as a "patio peach" but died back years ago and then sprouted up from its unknown (but peachy) rootstock. It grows at a 60° angle and tends to be ignored - by the thief as well as by us apparently. I guarded that tree, it was our last hope.

Squirrels! I was sure they were responsible for this affront. What else could climb the trees and steal unripe fruit? The deer damage the branches, but I couldn't imagine them gently plucking off an unripe peach and leaving the yummy foliage behind. It had to be squirrels. But how do you stop squirrels?

It turns out we did not need to learn about effective squirrel deterrents - they were innocent. Well, maybe only partially guilty. The truly guilty party would have managed to avoid all suspicion if he could have just resisted the mistake peaches.

I came outside from lunch, heading for the field when, in my peripheral vision, I saw movement at the mistake peach tree. I couldn't believe my eyes. I needed a camera for this. Too late, he got away.

What I had seen was a very large, wobbly bottomed creature sort of flomping his way backwards down the very skinny trunk of the mistake peach tree. It didn't seem possible. It defied gravity. But I saw it. A woodchuck. A ground hog. A whistle pig. We instantly named him fat boy and although I did not get a photo of him, I did manage to follow his trail of peach pits through the woods to his home!

Woodchucks don't care too much about hiding the entrance to their dens. They excavate huge amounts of soil and just sort of spread it around. 


A close up. The entrance hole is about the shape of his wobbly body.

Here's the part he didn't want us to see. The entrance is big and showy, but the escape route is much smaller and quite well hidden.

06 April 2013

On the way back in for that cup of tea...

I spotted this and wondered, errant beaver or teenager with a machete?


Yes, it was the latter. Karl has slowly been clearing the brush along the side of the field and asked Jack to help. I think he meant for Jack to clear the small saplings so Karl could bring down the bigger trees with the chainsaw, but this way works too.

Po-Ta-Toes!

Yes, it's potato planting time again! As cold and wet as it has been, the weather is perfect just now for getting the spuds in - the soil is moist but workable, and cold but warming up. We have a few warm days forecast and then rain - if you were a seed potato you would be very happy with that forecast! Karl opened up the trenches to warm the soil more and to add amendments before planting. The seed potato sends roots down so the nutrients want to be below the planted potato. As it grows, potatoes will form above the seed potato so that soil needs to be loose, or even not soil at all. Grass, leaves, straw - as long as the seed pieces are covered. The deeper the cover, the more potatoes you get. Sorry, this wasn't meant to become a how-to.

Here are the potatoes in four trenches - from left to right we have Red Maria, Blue Gold, Bintje and then a mixed row. They would have photographed a lot better if I had washed a few so you could see the colours rather than this brown on brown situation.

The potatoes look very close together, but they aren't, they are spaced one foot apart in the row. The rows are 220' long.

The next step is getting the potatoes covered. Karl is covering the first row with leaf mold - it makes the potatoes much easier to harvest, but we don't have enough for all four rows, so the other rows will be covered with the soil from their trenches. This is the back breaking part - it is done using a hoe.

I've got two rows done, where's Karl?

Oh, there he is - I think I'll leave the last row for him while I go in for a cup of tea.

26 March 2013

Outdoors is Really Scary!

Today was the first day outside for this year's chicks. With great excitement opened the chicken house door and... well nothing. I was ready with camera in hand (a rarity for me) but these were no divas.

They seem to have noticed the open door...

...but they do not trust it.

I've seen enough.

One brave girl makes the leap.
The rush starts.

Stampede!

That's enough, time to go back in.
I think about half of the girls ended up having a quick look outside. A little grass was eaten, a little dirt was scratched, but overall they didn't seem too impressed.

I went looking for something else to photograph and came across these lovely ladies:


Two Fat Hens!

An Easter Egger and a Speckled Sussex.

This is the speckliest Speckled Sussex we have ever owned. The photo looks out of focus, but I think it is just her feather pattern. Their bright red combs show they are in lay and sure enough - among today's eggs was one green egg and one pinkish egg.


14 March 2013

Chicken Tractors?


I had really wanted to move the chickens into tractors so they could clean up the field, eating the spent vegetable plants, bug, grubs and weed seeds, and at the same time we would know where they were laying their eggs. It seemed ideal and totally fitting with our sustainable method of farming, in theory. We built, or started to build, a couple of different styles of chicken tractors, but each time we had the same problem - they looked like a cage. Granted they were large cages (one was 8' by 8' by 2' another was 8' by 10' by 4'), but even with one chicken in each there was no space for that chicken to run like they do all over the farm at the moment. We couldn't do it.

Onto Plan Two (or three or four or five)
A new chicken house. This wasn't perfect - I still dreamed of the field clean-up crew and easy to find eggs - but the chicks were outgrowing their brooders and I had run out of tractor ideas. We decided to add onto the packing shed with the chicken door going out into the back field.


As Karl started building I became more and more excited about the possibilities. Can you make me a full sized door on the side for easy cleaning? If you make me a hatch on the side nearest the packing door shed I will be able to collect the eggs with ease. Oh, if you make another hatch under that first one I can put the feeders and waters under the nest boxes and fill them from outside. I have a great pan for the perches... He humoured me and I got everything I wanted - I hope the chickens appreciate it.


In this picture you can see the feeders and the space above where the nestboxes will go. These girls are still too young to lay eggs and they are too young for the perches I planned too - to the left you can see the re-purposed shelving they are using for learner perches. Sharp eyed individuals will recognise these as the old packing tent shelves. Before that they were plant stands at a big box store. This is probably the last use we will get from them, but it feels great to have given them over 9 years of life after they were destined for the dumpster.

The girls move in.
We introduced the girls to their new house, and to each other, on Tuesday evening. They had been in three separate brooders to give them the most space possible (even when they need to be in a secure enclosure we cannot stand the idea of them being cooped up - haha). First we took the feeders and waterers from the brooders, refilled them and hung them in the hen house (oops the pipe is bending - first design flaw noted). Then each group of pullets was taken from their brooder into a cage and carried to the hen house for release. Every single one of them ignored the open space and made a beeline for the water as though they had never seen water before in their lives. It made for a very disappointing photo opportunity.